
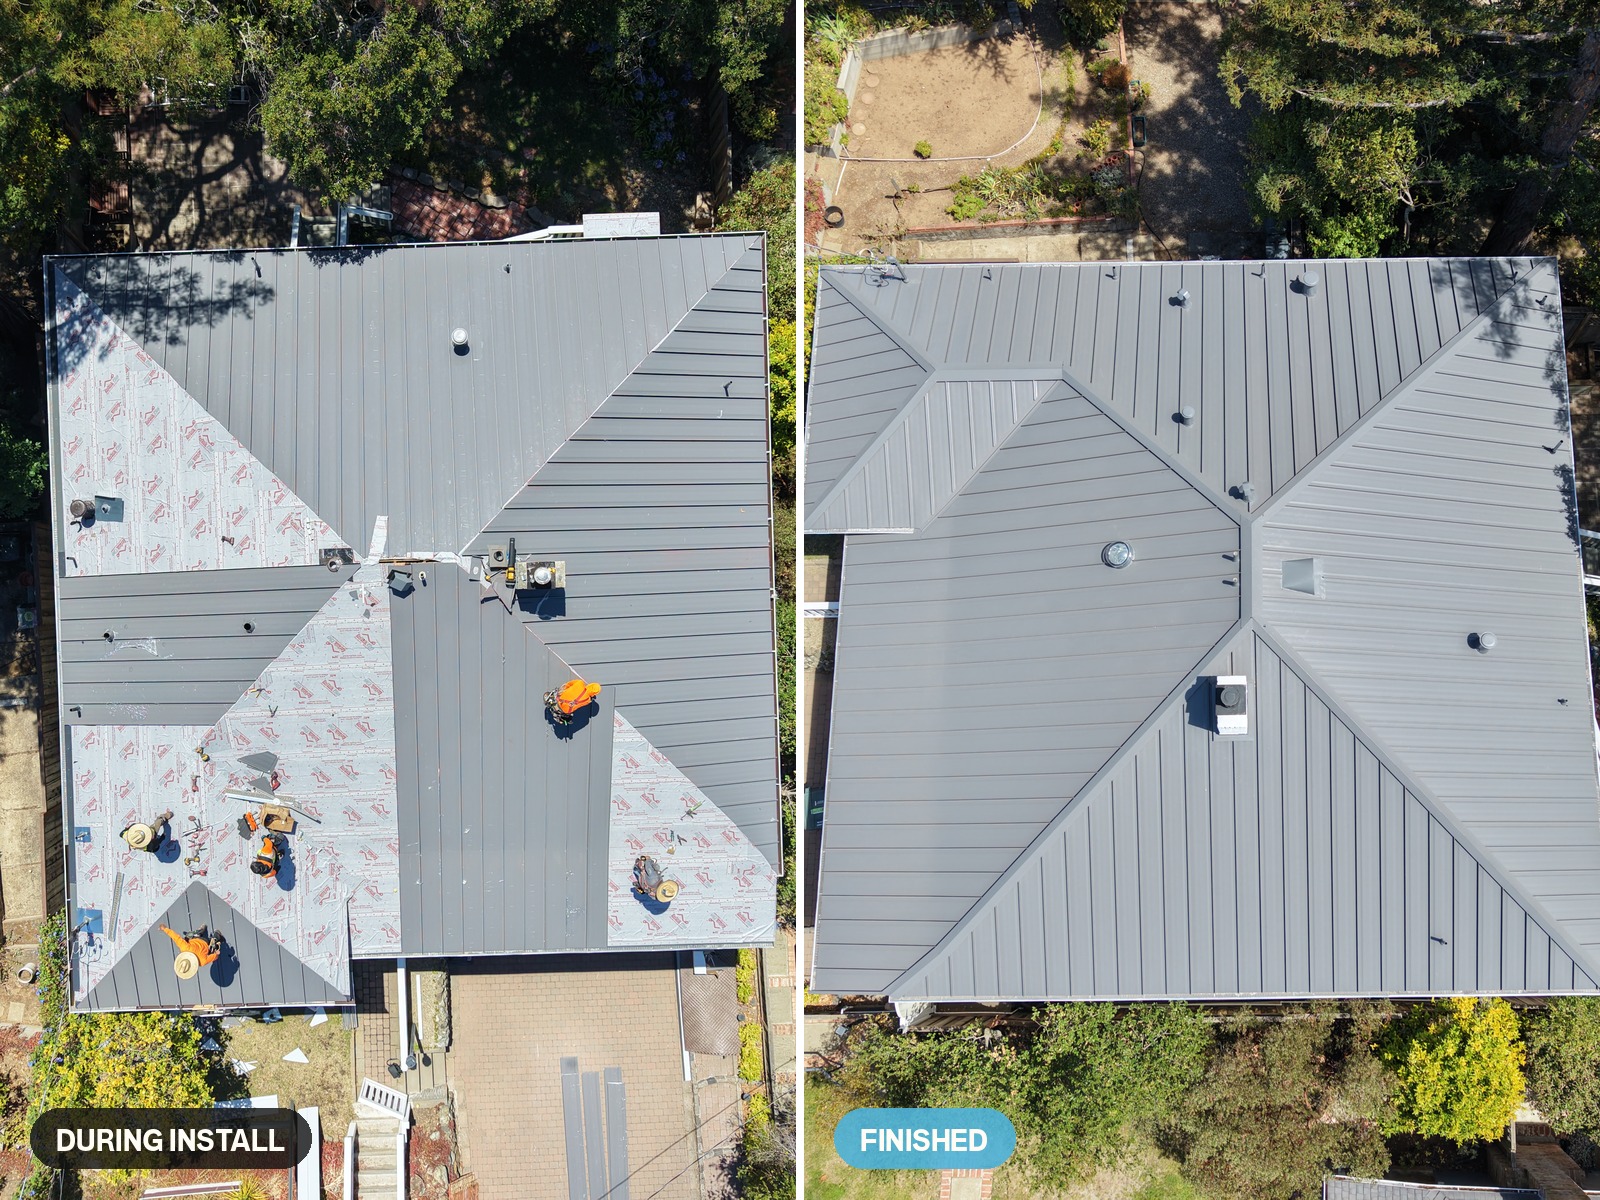

Most roofing pages show you the finished job. This one shows the middle. Skybleu flew a drone over this Most roofing pages show you the finished job. This one shows the middle. Skybleu flew a drone over this metal roof in Belmont twice: first with the crew still working, and then five weeks later with the house buttoned up. Here is what happens in between.
The material arrives wrapped
In the first set of photos, half the roof is grey metal and half still wears a white film printed with red lettering. That film is not underlayment. It is the protective layer the panels ship with, and it stays on through handling and installation so nothing scratches the finish on the way up the ladder.
The crew peels it once the panels lock in. Until then, a roof mid-install looks like a patchwork, and that is exactly how it should look.
Panels run eave to ridge, one piece each
Each panel covers the full run from the bottom edge to the peak. No horizontal joints anywhere in the field of the roof. That single decision separates standing seam from shingles, where every course creates a seam that will eventually leak.
Meanwhile, the seams themselves rise above the surface of the panel. Water runs in the flat between them and never sits on a fastener, because the fasteners hide underneath. Nothing penetrates the face of the roof.
The valleys take the time
This house carries a hip roof with several planes meeting at once. Look at the aerial shots and you can trace where one slope runs into the next. The crew cuts and fits those valleys on site, panel by panel, because no two match.
That is where the hours go. The flat runs move fast. However, the intersections are the craft.
Striated, not smooth
The owners chose charcoal grey in a striated finish. Striations are the fine lines rolled into the panel between the seams, and they serve a purpose beyond looks.
A wide flat panel tends to show oil canning — a gentle waviness that appears when light hits it at an angle. Striations stiffen the panel and break up the reflection, so the surface reads flat from the street. On a roof this visible, that detail matters.
A flat-panel version of the same system went on a recent project in Menlo Park. Same material, different finish, and a noticeably different look.
Five weeks, start to finish
The install photos carry a July 15 date. The finished photos carry August 21. In between: panels completed, flashing closed, vents and penetrations detailed, and the site cleaned.
Roofing timelines depend on size, pitch, weather, and whether the deck needs work once the old material comes off. A hip roof with this many planes takes longer than a simple gable. Still, five weeks from active install to final walkthrough is a realistic window for a job of this scale.
What to ask your roofer
- How many horizontal joints will the finished roof have? On standing seam, the answer should be none in the field.
- Does the system use exposed or concealed fasteners? Exposed-fastener metal costs less and starts leaking at the screws years sooner.
- Striated or smooth panels? Ask to see both in daylight before you decide.
- Who pulls the permit and schedules the final inspection?
Planning a metal roof in Belmont?
Skybleu holds CSLB C39 license 1067709 and works across Belmont, San Carlos, San Mateo, Redwood City and the wider Bay Area. Schedule a free consultation and we’ll walk your roof with you.